These No Bake Peanut Butter Oat Cups are a game-changer for anyone craving a sweet treat that doesn’t require turning on the oven. Made with just four simple ingredients, they come together in minutes and offer the perfect balance of chewy, nutty, and chocolatey goodness. Whether you’re looking for a quick snack, a post-workout bite, or a healthier dessert option, these little cups of joy have you covered. And the best part? You probably have everything you need in your pantry right now.
Why You’ll Love This Recipe
- Ridiculously Easy: With no baking involved, this recipe is ideal for beginners and busy folks alike. You just mix, pour, and chill—done!
- Only 4 Ingredients: That’s right. You can make a batch with pantry staples you already have on hand.
- Perfect Texture: The oats give a hearty chew, the peanut butter makes it creamy and rich, and the chocolate adds a silky finish.
- Great for Meal Prep: These oat cups store beautifully, making them perfect for grab-and-go snacks all week long.
Ingredients You’ll Need

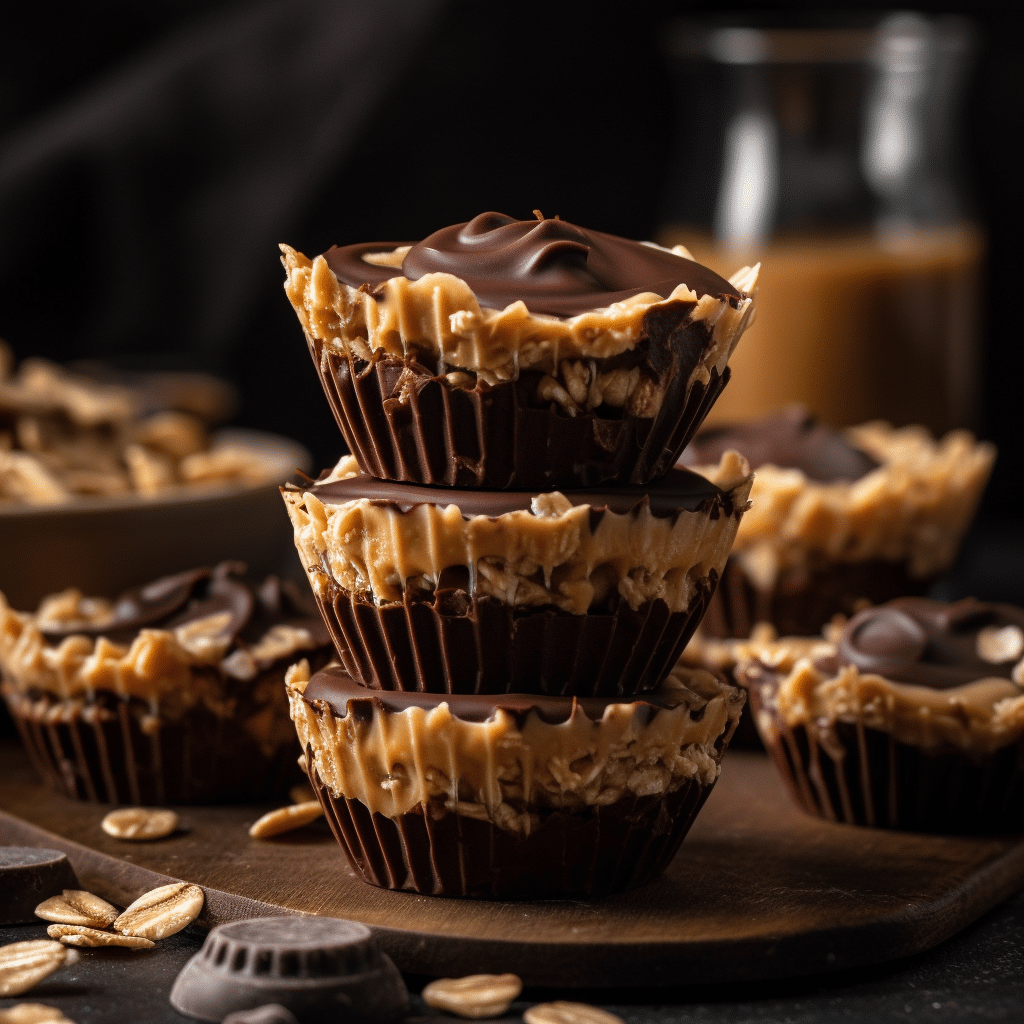
- Old-Fashioned Rolled Oats: For structure and chew. Avoid quick oats—they get too mushy.
- Peanut Butter: The creamy kind works best here for mixing and binding. Natural peanut butter can be used, but make sure it’s well-stirred.
- Maple Syrup or Honey: Adds natural sweetness and helps everything stick together. Use whichever you prefer or have on hand.
- Chocolate Chips: Melted for a luscious topping. Semi-sweet or dark chocolate are both excellent choices.
Variations
- Nut-Free Version: Swap peanut butter for sunflower seed butter or almond butter if needed.
- Boost the Nutrition: Add a sprinkle of chia seeds or flaxseeds for extra fiber and omega-3s.
- Make it Crunchy: Add crushed pretzels, chopped peanuts, or puffed rice for a little texture contrast.
- Flavored Twist: A dash of cinnamon or a splash of vanilla extract can elevate the flavor even more.
How to Make No Bake Peanut Butter Oat Cups
Step 1: Mix the Base
In a medium bowl, stir together the oats, peanut butter, and maple syrup until fully combined. The mixture should be thick and sticky but easy to press into a mold.
Step 2: Press into Muffin Tin
Line a muffin tin with paper liners. Scoop about 1½ tablespoons of the oat mixture into each cup, pressing down firmly to compact the base.
Step 3: Melt and Add Chocolate
In a microwave-safe bowl, melt the chocolate chips in 20-second bursts, stirring in between until smooth. Spoon the melted chocolate over each oat base and spread it out evenly.
Step 4: Chill
Place the muffin tin in the fridge or freezer for 20–30 minutes until the cups are firm. Once set, they’re ready to enjoy!
Pro Tips for Making the Recipe
- Use Silicone Molds or Liners: This makes removing the cups much easier and keeps the shape nice and clean.
- Press Firmly: Really pack down the oat mixture so it holds together when you bite into it.
- Don’t Overheat the Chocolate: It should be smooth and glossy—not scorched. Low and slow is the way to go.
- Room Temp Storage Tip: If your kitchen is cool, these can be kept at room temperature for a day or two—but fridge storage is best for longer freshness.
How to Serve
These oat cups are delicious straight from the fridge, especially with a cup of coffee or a tall glass of almond milk. They also make a great pre- or post-workout snack, lunchbox treat, or even a wholesome dessert. For a fancier presentation, sprinkle a bit of flaky sea salt on the chocolate before it sets—trust me, it’s a game-changer.
Make Ahead and Storage
Storing Leftovers
Keep the cups in an airtight container in the refrigerator. They’ll stay fresh for up to 7 days and maintain their texture perfectly.
Freezing
Want to make a big batch? Go ahead! These freeze like a dream. Layer them with parchment paper in a freezer-safe container and freeze for up to 3 months.
Reheating
No need to reheat! Just let frozen cups sit at room temperature for 10–15 minutes before eating.
FAQs
Can I use quick oats instead of rolled oats?
Yes, but the texture will be much softer and less chewy. Rolled oats really give the best bite here.
Is natural peanut butter okay to use?
Absolutely, but make sure it’s well-stirred and not too oily. If it’s too runny, the cups might not hold their shape well.
Can I use a different sweetener?
Sure! Honey, agave syrup, or brown rice syrup can all work. Just stick to a liquid sweetener to keep the mixture moist and cohesive.
Do I have to use muffin liners?
They make things easier, but you can skip them if you’re using a silicone muffin tray. Otherwise, lining is highly recommended to avoid sticking.
Final Thoughts
These No Bake Peanut Butter Oat Cups are everything you want in a snack—quick, satisfying, and made from real ingredients you can feel good about. Whether you’re meal-prepping for the week or just need a little treat to get you through the day, this recipe delivers every single time. Try them once, and they’ll be a staple in your kitchen forever!
Print
No Bake Peanut Butter Oat Cups Recipe
- Prep Time: 10 minutes
- Cook Time: 5 minutes
- Total Time: 35 minutes (includes chilling)
- Yield: 12 cups
- Category: Snack
- Method: No Bake
- Cuisine: American
- Diet: Vegan
Description
These no-bake peanut butter oat cups are a quick and healthy snack made with just 4 ingredients. Perfect for meal prep or an on-the-go treat.
Ingredients
- 1 cup natural peanut butter
- 1/4 cup maple syrup
- 2 cups rolled oats
- 1/2 cup dark chocolate chips (optional topping)
Instructions
- In a medium saucepan over low heat, combine the peanut butter and maple syrup. Stir until smooth and well combined.
- Remove from heat and mix in the rolled oats until fully coated.
- Spoon the mixture into a lined muffin tin, pressing down to form cups.
- Melt chocolate chips (if using) and drizzle or spread over the top of each cup.
- Refrigerate for at least 30 minutes until firm.
- Store in the fridge or freezer until ready to eat.
Notes
- Use gluten-free oats for a gluten-free version.
- Swap maple syrup with honey if preferred (not vegan).
- Add a pinch of salt if using unsalted peanut butter.